Yours Truely

Yours Truely

Saturday, June 11, 2011

Buttons?

I was on one of my regular scavenger hunts at Joann's and found these really cool buttons, I have a few ideas for them but for right now they sit in a container somewhere among my crafting supplies.


So as soon as I find them and do something with them I will show you.


Thursday, June 9, 2011

Bunny Ear Beanie

Ok so we have taken quite alot of time off, sorry everyone I guess it happens.

 This was a beanie Harmony asked me to make for baby Livy and of course I can't say no to Harmony or Livy.
I started with a regular beanie, a pattern that I am most comfortable making.
(If you want that pattern I can email it to you)
Ears
Make 2 outer ears using white.
Row 1: Ch 35 or more if you want longer ears
Row 2: Sc in 2nd ch from hook, (sc in next ch, hdc in next 4 ch, dc in next 4 ch, triple crochet in next 15 ch, dc in next 4 ch, hdc in next 4 ch, sc in next 2 ch)
Row 3: Ch 1 and connect to other side of ch 35 with a sc. Then (sc in next ch, hdc in next 4 ch, dc in next 4 ch, tr in next 15 ch, dc in next 4 ch, hdc in next 4 ch, sc in next 2 ch)
Row 4: Ch 1 and connect to other side with a sc. Then (sc in next ch, hdc in next 4 ch, dc in next 4 ch, tr in next 15 ch, dc in next 4 ch, hdc in next 4 ch, sc in next 2 ch) you can continue if you would like a wider ear...
Row 5: Ch 1 and sc around and fasten off.
Make 2 inner ears with color of your choiceRepeat Outer ears Rows 1-4
Stack ears together and connect with a sc around
Then lay your beanie flat and eye how far down from the top you want your ears to start and sew them on.



Saturday, April 23, 2011

Onesie Dress

 I am back! I've been trying to figure out how to fit in time for crafts, and have 3 demanding kids. Solution? Stay up really late and regret it the next morning. Sometimes you just have to have me time. I really wanted to make my girls matching skirts that they could wear to all the family Easter parties, but apparently this 3rd child has zapped all my brain cells and I can't remember how to make things. I did manage to finally get something to turn out. I know the pictures aren't great, but I was in a hurry because my two year old thinks that any time I try to do something besides give her my total attention she needs to throw huge fits. I can see why people stop at 3 kids. ha. We are hopefully finishing the nursery today so look for a post about that soon.


Monday, April 11, 2011

Covered Diaper Wipe Case

The other night I was all set up to have a movie night with the hubby. Then one unwilling 3yr old required daddy to lay by him and my loving husband fell asleep, so out with the movie and in with a craft!
First off I want to say I got my idea for this from Leah.

I started with a sheet of felt, a travel diaper wipe case, about 11 inches of fabric, enough ribon to go around the top and bottom of the case, I used 5/8 in and had to cut it to fit better so I recomend 1/4 in , fabri-tac. ( Fabri-tac really is crucial here, hot glue will leave it lumpy and other liquid glues like tacky glue will show through your fabric)

Place the case on the felt, trace a top and bottom, cut these out and use your fabri-tac to glue it to the case.


Cut the fabric so that you have enough to go down the sides, this makes it so you have finished edges in the end, glue that to your felt.


When you have glued the fabric to the large part of the case trim down the extra fabric so you have exactly what you need and then glue the sides ( when glueing the corners its easier to make a small cut and overlap the fabric so it lays flat. I hope that makes sense.)

Start in the back of the case and glue your ribbon on, I used a lighter to melt the cut edges so they wouldn't fray. I also found it easiest when I applied the glue to the ribbon and placed it instead of directly to the case.


Cookies and Cream Cake

This cake originated as a cupcake but I tweeked it a little and made it a cake instead.
I started with my favorite chocolate cake mix and made it according to the directions on the box. Set aside to cool.
The magic here is really in the frosting anyway.
Are you ready to gain a few pounds? Haha, but really it might happen when you tast it.
~Buttercream frosting~
   1 stick butter (don't use margarine its yucky) room temperature. Not melted, but they way it is when you leave it out and go to grab it and use a little to much force and it squishes everywhere, ya thats right.
        3 to 3 1/2 cups powerdered sugar (this depends on how creamy you want it so start with 3 and work your way up.)
3-4 TBS milk  (again this goes back to the creamyness start with 3)                                        
1 1/2 tsp vanilla                  
Whip butter for 30 sec. slowly add sugar, milk and vanilla.
Generously frost cake.
Take 18 Oreo cookies place them in a ziploc bag and smash them into wonderful little pieces. Pour oreo pieces over frosted cake and enjoy. But remember you have been warned.
                                                                                                     

Tuesday, April 5, 2011

Freezer Paper Stencils

One of my most favorite projects to do is freezer paper stencils. Pretty much because they are dummy proof. Freezer paper can be found at any grocery store really... this is unless you're me. I went to 3 different places before I found it at Maceys. (By the plastic wrap and foil by the way)And trust me, at 5 something for the whole thing itll last a LONG LONG time.

First I found a picture I really liked on the net. Then cut out a piece of freezer paper the size of a reg printer paper (8 1/2 x 11 which is exactly half the width of the freezer paper) Then I put it mat- NOT SHINY- side down. Now this all depends on youre printer. But never print on the shiny side. Then I cut out the pieces with my xacto knife.


I only used a few of the butterflies on the print. You can also use your Cricut or Silhouette to cut out the letters ans shapes you want. Just remember to place the shiny side up so the freezer paper will stick to the Cricut mat.
Then I iron the freezer paper in place on my fabric  (shiny side down) Make sure the iron is on a dry setting.

 If you look closely I used a shirt that had stains on it. A good way to cover them up.


This is the paint I got at Walmart. It says 3D  but if you put it on a plate so you can brush it on it works just as well. Maybe even better. Although Im not sure why is says "Poppin' Purple"...

She wanted to help soooo bad. So I let her do a few wings.  
 Almost finished...

You do not have to wait until it's dry to take the stencil off but be careful when you do. 
Finished product. 


Leah 

Wednesday, March 30, 2011

Burp Cloth

 My sweet hubby got me a really nice Bernina Activia 220 sewing machine for my high school graduation and I love to get my sewing on! 


 This is a simple but fun project and you don't need to be a master seamstress or have the kind of machine I have to achive this personalized baby gift.  I started with a package of  cloth diapers. I couldn't find anything smaller then a 12 count package but I know a few girls having babies this year so they aren't going to sit around the house and wait for a place to go.


This is my son Sean and the keeper of anything I'm not currently touching when I do crafts.
(Please don't mind the full garbage can in the background, it's the one thing I refuse to do.)


 Then I got some bright colored cotton fabric from Joann's, I cut the fabric to 5 1/2 in by 19 1/2 in.using my rotary cutter and matt, (I can't tell you how nice it is to have them, if you want to make blankets or anything really with a strait line I suggest getting one.) So then I folded the fabric under 1/4 in all the way around to make sure I had a finished edge and sew that down the middle of my cloth diaper, but I didn't think that was cute enough so then I found some really cute ribbon and cut two 20 in pieces folded it under 1/2 in on both sides and sew it down the long sides of the fabric overlaping the fabric just a little bit. I made one in purple and one in pink roll them up, tie them together with some more ribbon and you got a beautiful gift.


Thursday, March 24, 2011

Chalkboard

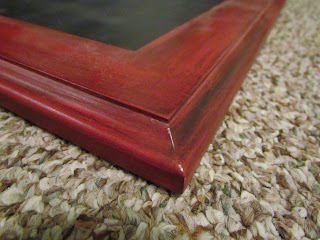
 I really wanted to make a chalkboard for the kids because honestly I'm tired of all the paper scraps that get left around and cut and marker on my couches and etc. Chalk is cheap and so was this project. The doors I got for FREE from my cousin who works at a shop and gave me these doors because they were defective. In the future Ill be paying a small fee by than retail price which can be upwards of 30-60 a piece. Go ahead and cringe that I painted them instead of put vinyl on them =)


The before- Really just the back side to show you

One for Kymber's bedroom

My Kitchen one
 I used paintable chalkboard paint in the past and honestly it was harder to work with and left streaks and it was just as costly as the spray paint. (I found at home depot finally by the way) Cost was about $4.97. It'll last you forever, whereas the paintable one you could only do maybe 2 projects. I've done a few and the can still seems full. I aged it by watering down the acrylic black paint I had. I'm in love!


If anyone is interested in one of these I'd be glad to make one for them for a small fee. Negotiable!

Leah

Tuesday, March 22, 2011

Diaper Cakes


I know what you are thinking finally this girl is posting something. Thanks to qwest we now have the internet back in our lives!!! YEY!!!! You know what that means I can actually share the things that I have made. EEK!!!
This is the first thing I want to show off is my hand made diaper cakes. I really didn't think they would be easy to make but they actually really are. With a bunch of rubber bands, new born diapers, ribbion, small baby needed items (binkys, bottles, travel soaps etc) and embellishments I have created a very cute gifts for a babies. It even doubles  as an adorable center piece.
 

Saturday, March 19, 2011

Teddy Bear Beanie and Diaper Cover

Ok so do you remember the beanie and diaper cover I said I made for Harmony? 
Thanks to Niki at http://nixpixphotography.blogspot.com/ I finaly got pictures of Harmony's adorable baby in them.


       I love the way this turned out, and thanks again Niki you did a great job with these pictures.


Sunday, March 13, 2011

St. Patrick's Day Wreath

Ok I first have to say I'm really sorry for my negligence.
I have had this wreath done for a few weeks and haven't posted. First there was a great book by Kieth Merrill called "The Evolution of Thomas Hall" I highly recomend it, but you will have to wait until October of 2011 to get it ( pre - releases are a perk of working in a book store.) Then I made a really cute teddy bear beanie and diaper cover for Harmony's B.E.A.U.tiful baby, ( I kind of gave her the beanie before I took pics so they are on thier way.)  Then I started a couple other things before I realized I hadn't filled you in on my wreath.

I love St. Patrick's Day! I decided to do this wreath to celebrate.
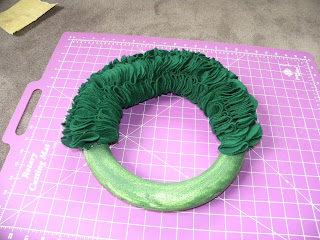
  It is a simple foam wreath with felt hotglued to it.
I started with only half a yard but ended up going back for another half yard to total 1 full yard.
I used my rotary cutter and mat to cut the felt into 3" squares then folded them in half and half again.

I then used my scissors to round the corners,


add a little hot glue and tada!

Wednesday, March 9, 2011

Baby shower cake

Apparently we're a bunch of slackers on the blog as of late. Maybe it's because our cute Harmony finally had baby #3....and it was a girl!
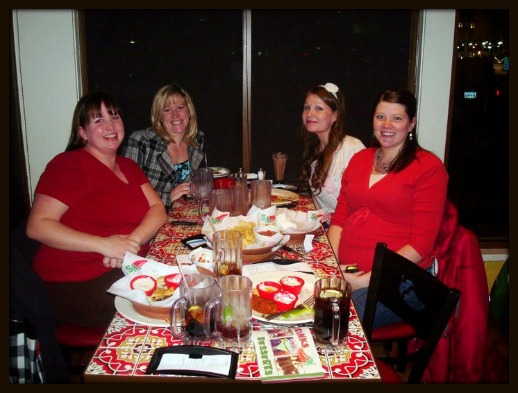
Last Friday we decided to have a surprise baby shower for her at Brick Oven. It was kind of hard to plan only because they decided not for find out the sex (as you've read in her previous posts) I took on the task of making her a cute cake. NEVEr made this kind before. And I've gotta tell you- Im impressed with myself. Not an expert, but pretty darn good for the first time wouldn't you think?